Thursday, December 13, 2012

DSLR UNTUK BEGINNER


Kebanyakkan mereka yang nak beli DSLR selalu keliru DSLR mana satu yang sesuai untuk mereka. Ada kes seorang member ni, langsung tiada pengalaman guna DSLR, bila nak beli, terus beli model yang advance. Last-last kamera tu dia jual dan tukar dengan digital kamera. Padan muka, aku suruh beli model untuk beginner taknak dengar, berlagak sangat beli yang advance..haha..
Baiklah, entri kali ni akan beri sedikit panduan untuk beginnner/newbie beli DSLR pertama. Sebelum kita pilih model DSLR, jom tengok dulu apa ciri-ciri yang perlu korang ambik berat masa nak beli kamera pertama.
1. Mudah digunakan
Interface kena menarik, senang dan tak serabut. Nak pegi kat mana-mana setting pun tak susah. So far yang aku tengok Sony memang terbaik dalam user interface yang mesra pengguna.
2. Live View
Live View bukanlah fungsi yang wajib, tapi dari pengalaman aku, LV memang diperlukan dalam keadaan tertentu, terutama bila nak shoot pada sudut yang sukar. Lainlah korang jenis yang tak kisah menonggeng di khalayak ramai.
3. Harga Murah
Biasanya untuk entry level DSLR, korang boleh dapat dalam harga sekitar RM2500. Aku tak galakkan korang beli kamera yang mahal. Lebih baik invest untuk akserosi seperti lens atau flash.
4. Brand Kamera Member
Pilih brand yang kebanyakkan member korang pakai. Contohnya kalau ramai member yang pakai Canon, korang beli Canon. Jadi senang korang nak mintak ajar atau berkongsi aksesori. Make sense right?
Korang boleh baca entri “Nak beli mana satu?” untuk tips-tips yang lebih lengkap.
Antara DSLR yang aku rekemen untuk beginner adalah seperti berikut. Harga bawah rm2500.
1. Canon 1100D/1000D
canon eos 1100d DSLR Untuk Beginner
2. Nikon D5100/D3100
nikond51001 DSLR Untuk Beginner
3. Sony A550/A500
Ada banyak lagi brand macam Pentax, Olympus dan Lumix. Cuma masalah dengan brand-brand ni adalah aksesori 3rd party yang limited. So agak susah kalau korang cari lens, flash atau aksesori lain untuk brand-brand ini.
sony alpha a500 DSLR Untuk Beginner
Lepas beli kamera tu, jangan lupa baca manual. DSLR bukanlah macam mesin basuh, tak baca manual pun korang boleh guna. So please read your manual. Tak payah pegi internet atau pegi kedai buku cari majalah fotografi, khatam dulu manual. Manual tu umpama “muqaddam”. Tak khatam muqaddam, macam mana nak baca Al-Quran? Betul tak?
Lagi satu, bagi yang tak cukup bajet, korang boleh beli second hand DSLR. Jangan risau beli DSLR second hand sebab kebanyakkan DSLR second hand masih dalam keadaan baik. Boleh rujuk entri “Tips Beli Kamera Terpakai”.
Apa-apa pun, dalam memilih DSLR, yang paling penting ialah keselesaan. Kalau korang pegang DSLR tu dan korang rasa selesa, abaikan tips-tips yang aku bagi, terus beli DSLR tu. Itulah yang aku buat masa beli DSLR pertama 4 tahun lepas. Mulanya aku memang nak ambik Nikon d40x, tapi bila pegang Sony A300, rasa selesa sangat bila pegang, dan aku terus grab Sony A300 walaupun mulanya Nikon d40x tu idaman aku.
Mengenai aksesori pulak, aku akan buat dalam entri seterusnya. Aku akan cuba guide korang untuk pilih aksesori DSLR sama ada lens, battery grip, atau flash yang patut korang beli dulu.
Harap entri ringkas ni sedikit sebanyak membantu korang untuk beli DSLR pertama.
Monday, April 30, 2012

Must-Have DSLR Accessories


Every photographer has a toolbox of camera accessories that are heavily used for photography. While some photographers have a large array of accessories for every type of situation and need, others only buy what they feel is necessity for their photography work. In this article, I will provide some detailed information about what accessories should be in every photographer’s bag – I call it a “must-have” list.

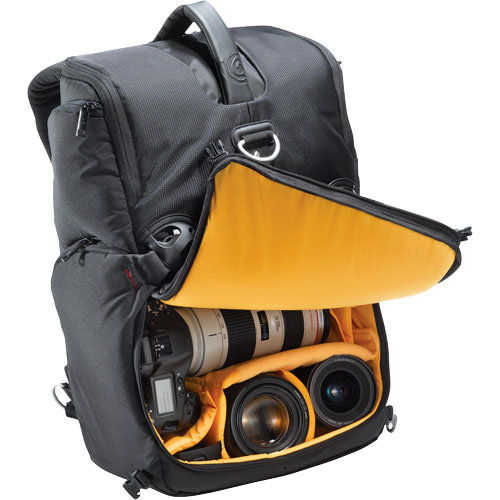
1) A good camera bag

As soon as you buy a camera, you buy a camera bag, because you want to protect your investment and easily transport it between locations. But choosing the right camera bag is not always easy – there are so many different bags out there, that it gets frustratingly difficult to make the right decision. Often times, people end up buying a small camera bag, only to replace it in a couple of months with a different one, realizing that they need more room for their camera and lenses. This happens all the time and it also happened to me! I got my first Nikon D80 DSLR, thinking that I wouldn’t spend a penny more on an already expensive camera. I bought a compact camera bag that fits the camera and a couple of lenses and thought that I was good to go. Eventually, I ended up buying another lens and extra accessories and my bag was too small to accommodate everything. So I had to go and buy another camera bag with more room. Instead of wasting your money like this, you should buy a good camera bag from the get-go. I personally prefer a backpack, but some people like the convenience of using sling-bags and shoulder bags. It is a personal preference and you should definitely try before you buy…a local camera store is a great place to start. My personal favorites are LowePro and Kata bags, specifically LowePro Pro Runner 300 AW and Kata 3 in 1 Sling Backpack.
Kata 3 in 1 Sling Backpack

2) Extra battery

An extra battery is an indispensable accessory that will definitely come in handy, especially when traveling. If you do not already have an extra battery, you should definitely buy one before your next trip or vacation. One more thing – batteries do not last long when you shoot in cold temperatures, so be prepared for a short battery life if you are shooting in freezing conditions.

3) LCD Protector

Although many DSLR cameras come with a plastic protector for the camera LCD, I still highly recommend protecting the rear LCD with a regular screen protector. Sometimes dust gets in between the LCD and the plastic screen protector and scratches the LCD. A DSLR camera with a scratched LCD is not going to have a good resell value, so that’s the first thing you should do to keep it away from scratches. The ZAGGinvisibleSHIELD LCD protectors work great and you can find those at almost any size to fit your LCD. Once you protect it, don’t forget to put the plastic protector back in place, if you have one.

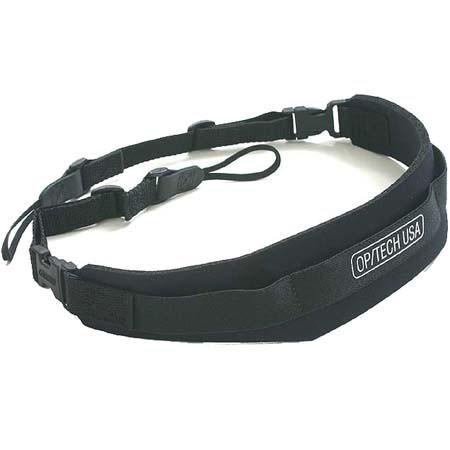
4) Padded neck strap for your DSLR

The neck straps that come with DSLR cameras are very uncomfortable. When you carry a heavy camera+lens combo on your neck, a standard camera strap can leave painful bruises on your neck, after just an hour or two of wearing the camera. Gladly, there are many excellent neck straps available today such as Op/Tech Pro Loop Strap that I cannot live without. It is soft, very comfortable and can easily hold my heavy Nikon D700 + battery pack with a large lens such as Nikon 70-200mm VR II without any problems. Another super-popular camera strap is the RS5 Strap from Black Rapid, so check it out as well.
Op-Tech Pro Loop Strap

5) Lens cleaning kit

Dust and dirt in front of the lens element reduces lens contrast, resulting in cloudy-looking images. Therefore, you should always keep lens front and back elements clean at all times. There are plenty of different brands to choose from and any of the optical solutions should work fine. Check out some cleaning kits from Nikon andZeiss.

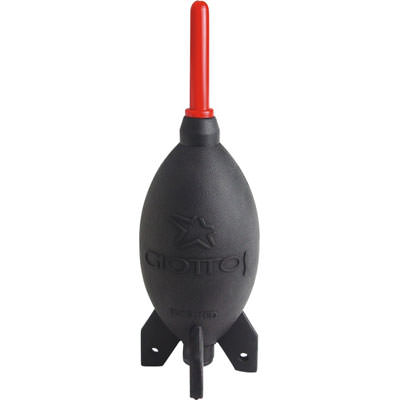
6) Giottos Rocket Blower

The Giottos Rocket Blower is a miracle when it comes to blowing off dust from your camera gear. It only costs ten bucks, but this is one tool that you will be carrying with you in your camera bag at all times! It helps me keep my lenses clean and it does a really good job blowing off dust from the camera sensor when I’m traveling. Give it a try and you won’t regret it.
Giottos Rocket Blower

7) Sturdy tripod

A good, sturdy tripod is a must-have for low-light, night and landscape photography. Don’t buy cheap plastic tripods that can easily break – you do not want to put your expensive DSLR equipment on a crappy tripod. Always make sure that the tripod you are buying can handle at least twice more weight than your DSLR and lens. I have heard plenty of horror stories about expensive DSLR cameras falling off from crappy tripods! The best tripods are made by Gitzo, but they are expensive (starting from $400 and up). Manfrotto also manufactures very good tripods and you can buy tripod legs and a head separately, or buy a tripod system. Some of the cheapest tripods are by Sunpak (priced under $100) and you can find them even in such stores as Best Buy. I have also heard that the Slik tripods are very good in terms of value and price, such as the Slik 700DX Pro.

8) Remote Shutter Release

Don’t forget to grab a remote shutter release for your DSLR along with the tripod. You can easily cause camera shake on a long lens setup, even if you are using a sturdy tripod. When you work with slow shutter speeds, ever bit of vibration can cause your image to be blurry. A remote shutter release will let you fire your camera without touching it. Many of the entry-level DSLRs have infrared remotes that are very lightweight, compact and best of all – wireless. If you are shooting on a pro-level body, you will most likely have to buy a wired solution. Both Nikon and Canon have a good selection of remote shutter releases and I recommend getting one that supports “bulb” mode (more than 30 seconds exposure) with an exposure lock.

9) Lens UV/Protection Filter

Get used to buying a lens protection filter while buying a lens. If you do not already have one, definitely buy one as soon as possible. Not only do protection filters help protect your lens from accidental damage, but they also make it easier to clean lenses, especially when the front element of the lens sticks out in a round form. Although some photographers claim that filters degrade image quality, I have been shooting with filters for years and have learned that good filters almost do not affect image quality. Just buy good filters such as B+W or Hoya Pro series and forget about what everyone else says.

10) Polarizing Filter

If you are thinking about taking pictures of landscapes and architecture, a polarizing filter is another “must-have” accessory. I wrote an article on how to use a polarizing filter before and I highly recommend to check it out. Basically, a polarizing filter can reduce reflections from objects such as water and glass and can be used to darken the sky and bring out the clouds, making the scene look much more vivid. I do not recommend keeping it on your lens at all times, since a polarizing filter slows your camera down by reducing the amount of light that passes through it.

want to know more: